Showing posts with label breast. Show all posts

Friday, October 11, 2013

Adventures in Baby Food Making

Strange Tofu Combination


...that my girls' can't seem to get enough of is tofu with bananas and blueberries. It smells as terrible as it sounds but my girls inhale it like it's ice cream. Wut?!

Source
Here's how you make it:
  • Tofu, firm
  • 2 bananas
  • 1 small carton of blueberries
  • (optional) breast milk

Slice the tofu and lay flat on paper towels to absorb excess water. The boxes of tofu I buy yields approximately six slices. You can place paper towels on top of the slices as well to sop up maximum amounts of water. I recommend making the extra effort.

That's a tough as it gets.

Afterward, combine all ingredients with a food processor until fully incorporated. The bananas can be stubborn and might need a little help making their way to the blades.

Add breast milk if you would like the consistency to be a little more liquid.

The end result is going to be a gorgeous purple color. Fun!

Side note: I have one baby who is a vacuum cleaner. She eats everything. My other little one? She's the pickiest little thing I've ever met but this combination is probably her all time favorite meal right now.

Wednesday, August 14, 2013

Pro Tip

Pumping


This is the holy grail of pumping tips - all of the things I wish I had known when starting out!

  • Angled Breast Pump Flanges. I use Pumpin' Pal Angled Pumping Flanges. These flange are significantly more comfortable than the standard ones that came with my Medela pump. The fit is better for a range of sizes and the angle allows you to lean back a bit more to ease up on the rigidity of sitting up super straight. This will increase your comfort and probably allow you to pump more.
  • Hands Free Bra. I use the Medela Easy Expression Bustier. This is awesome now but was essential in the hospital after delivery. I was exhausted and would fall asleep while trying to hold the flanges onto my body. The heartache of losing those hard earned drops of colostrum could have been avoided if I had used this bustier from day one!
  • Polysporin. I've found this triple antibiotic to be the best choice because it's effective and low maintenance. There's no need to wash it from your skin between pumping sessions.
  • Storage and Cleanliness. At the beginning, I was disassembling the pumping pieces and cleaning every little piece by hand... every three hours... all day (and night) long. Then, I discovered this little tidbit. Store your pieces (membranes, connectors, valves, and bottles) in the fridge between pumping sessions. Breast milk, when refrigerated, is good for up to five(ish) days. This applies to the small amounts of milk left in your pump pieces, as well. As a general rule, I still clean my parts and pieces once per day.
  • Hospital Grade Pump. At least for the first three to six months, I would recommend renting a hospital grade pump. I rented mine from Babies 'R Us. Every time I switched back to my Medela Double Electric, I would become engorged and could only get true relief from the Symphony (Medela brand hospital grade pump.)
  • Massage, Massage, Massage! Massage your breasts during your pumping session. Give extra care to those areas that seem harder. I have never had mastitis and attribute this to massaging out any plugged ducts before the situation escalated.
  • Timing. 20 minutes long; every three hours; all day and all night long (until your supply has been established). Just do it.
  • Overproducing? Freeze it! You'll thank yourself later. My supply became inadequate when both of my girls were drinking seven ounces each, every three hours. It helped that I had hundreds of ounces stored in the freezer from those early days when my body was overproducing like a crazy lady.
  • Destress. If you're stressed, your milk will not flow as freely. Once I tried to pump on a plane while sitting right next to the restroom with a very long line of passengers during a four-hour layover. As if that weren't enough, my mother-in-law was traveling with us and was overstimulating my poor tired girls, causing them to cry uncontrollably, which meant I had to take one while my husband took the other and try to calm them down while seating in a tiny area with a hoodie across my chest. Needless to say, I pumped a good ounce or two total.
  • Pump While the Babes Eat. It was nearly impossible for me to keep two babies happy long enough to get a 20-minute pumping session accomplished (especially during their colic-y phase... it's getting easier now). By some miracle (curse?), it seems as if they're never sleeping when it's time to pump, either! The next best thing? Occupy them with a feeding! They drink their bottles while I pump and we're all finished right about the same time. If they're done first, I can burp them and change diapers as needed.

Why do I think I have any right to give advice on pumping? Because I'm 6.5 months into (almost) exclusively pumping for my twin girls and I'm rocking it! (...if I do say so myself *pat pat*)

Other recommended products:

Monday, August 12, 2013

Make It

Baby Food Edition


Black Beans


Prep time: 3 hours
Yields: approximately 50 ounces

The first legume we introduced to the girls was black beans. Although simple, this method took forever. On the bright side, it did make enough beans to last us for pretty much forever. I don't think I'll ever need to make another batch. ...Seriously.

This process was so long and boring I didn't even take my own pictures. You'll just have to trust me on this...

Source
Sort beans - remove any rocks (seriously, the directions say this... I've never made dried beans from a package before so this seemed weird to me)
Source
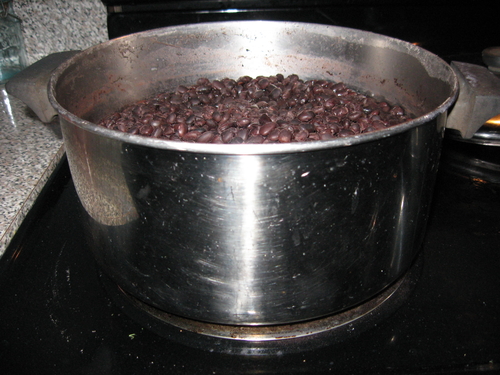
Pre-soak beans according to package directions. Mine said to boil in two inches of water for two minutes. Then cover and let sit for one hour. Drain and rinse. Initially, I thought the beans were done after this step, but then I realized this was just the precursor to the actual cooking of the beans. Omg...
Source
Next, put beans in a pan with six cups of water and simmer for 1.5 - 2 hours. I simmered mine for the full two hours to ensure they were tender and easily mash-able by the food processor. Drain and pour into food processor (or blender, in my case).
Source
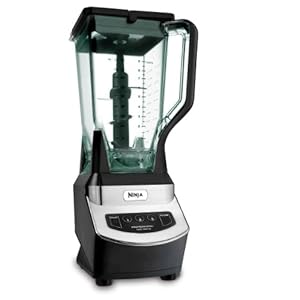
I ended up using my Ninja (blender) to puree the beans because my large food processor decided it was not going to work today. I added quite a bit of milk to fully incorporate the beans and to reach desired consistency.
Source
This is pretty much what it looked like in the end. I added quite a bit more milk so my puree is much smoother.
Source
Finally, I loaded up my OXO Tot baby blocks and froze most of the beans to be eaten at a later date, as my girls didn't quite take to the taste right away. After about a week, they're starting to prefer this a bit more.

Friday, August 9, 2013

Let's Celebrate

August is National Breastfeeding Month


Shout out to all the mom's who provide milk to their babies in some form or fashion. I wasn't cool enough to figure out nursing with twins, so I pump, but I fully support what you're doing ladies! *High Five*

Source

Side note: I'm going strong well into my sixth month (and two weeks, but who's counting?) pumping for my baby girls. Yay, me.

Friday, August 2, 2013

Pro Tip

Baby Bottles


Being a total noob to parenting, I made sure to buy an assortment of 4 ounce and 8 ounce bottles. In retrospect, I wish I had bought all 8 ounce bottles.

At some point, your little ones are going to need way more than four ounces and you won't have a use for those tiny bottles any more!

Baby Food

Adventures in Homemade Baby Food Making

Bananas and Sweet Potatoes


The girls hit six months old at the end of July. For us, this meant starting SOLIDS!! I swear it feels like I've been waiting years for this day. Pushy relatives hoped we'd start solids much sooner and wondered allowed if our girls were eating enough. GRRRR. Being my stubborn self, this motivated me to wait until they were exactly six months to start solids.

Side note: EXCLUSIVE consumption of breast milk is awesome for your babies until as late as 9 months of age. The practice of starting solids at 6 months is solely to introduce the idea; not for nutritional value.

I digress... After much research, we decided to skip the rice cereal and go straight to solid food (fruits and veggies). This decision was made based on the fact that rice cereal offers no health benefits and is usually just a 'filler' food. Ain't nobody got time for that! In an attempt to hype up my husband, I asked him what he wanted their first solids to be. He chose bananas.

Another side note: Most experts say to introduce vegetables before fruits but I am picking my battles and I don't think the girls are suffering too much for this oversight.

Bananas are simple enough. You mash, mix in some breast milk (or formula, as the case may be), and serve. One of my girls loved it... the other did what we like to call the 'full body shudder.' 1 out of 2 ain't bad!

A few days later, it was time to try out the next food. I carefully planned a full month's worth of offerings to introduce a healthy balance of fruits and vegetables, then meats and legumes. See bottom of post for sample calendar. (yes... I'm super type-A)

Food #2 was a veggie: sweet potatoes. Considering this was my first real adventure in baby food making, I'll give myself a B+. There are things I'll do differently in the future, but it went okay. To begin, I cooked the sweet potato on the stove until soft (in the future, I'll cook a little longer). Once done, I peeled off the skin (surprisingly very easy to do!), cut into cubes, and throw into the food processor. Pulse the potatoes until fully 'processed.' Adding liquids will help with this process. If using breast milk, you may want to wait until the potatoes have cooled a bit, so as not to disrupt the makeup of the breast milk.

Tip: Breast milk will keep in the fridge for up to five days. Here are some options:
  • Use up whatever baby food you've premixed with the breast milk in five days.
  • Immediately freeze anything you won't use.
  • Wait to incorporate any breast milk until you're ready to serve the baby food to your infant (if possible.)

This is our first month of solids - feel free to use and adapt this schedule.
Sun
Mon
Tues
Wed
Thurs
Fri
Sat
July 28


Pureed bananas
29
30
Pureed sweet potato
31


1
2


Pureed pears
3
4
5


Pureed avocado
6
7


8


Applesauce
9
10
11


Pureed carrots
12
13
14


Pureed chicken
15
16
17
Pureed black beans
18
19
20


Pureed squash
21


22
23


Pureed peaches
24
25
26


Pureed beef
27
28


29


Pureed chickpeas
30
31